I'm always amazed at the number of people that are quite happy to drive around without a working fuel gauge! They are a simple electro/mechanical device and usually easily repaired. So throw that dip stick away, grab some tools and get yours working again.
Finding the problem with your fuel gauge is the first step, and is usually a simple process of elimination. Start by working through this chart, then read further for troubleshooting all the individual parts.
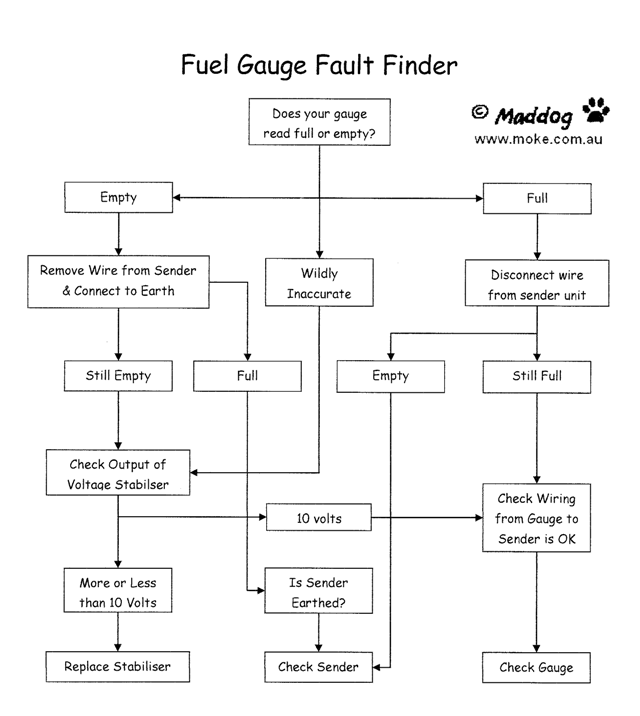
Click here for a full size printable version.
The Basics - or How It Works
Nothing too spectacular here - the wiring is very simple. But a basic understanding of how it works will get you half way to solving any problems.
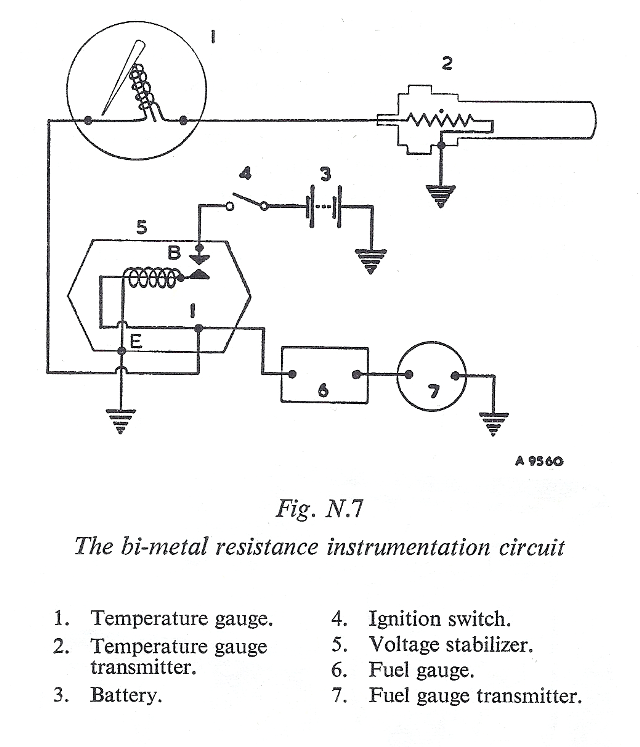
Power is supplied to the voltage stabilizer by a green wire from the switched side of the fuse box to the B terminal. Output from the voltage stabilizer is a light green wire from the I terminal, about 6 inches long, and connects to the left hand terminal of the gauge (as veiwed from the back). Feed from the sender unit is a green wire with a black trace, and connects to the right hand terminal on the back of the gauge.
The gauge is a simple voltage meter fed a constant 10 volts positive from the stabiliser. The level is indicated by changing the earth provided to the gauge by a variable resistor - the fuel tank sender.
For a gauge that always reads full, you'd be looking for a sender wire that has rubbed through and is earthing on the body somewhere. For an always empty gauge it would be a broken wire, or no power to the gauge.
Obviously you can ignore the temperature gauge wiring in a moke, but if you ever fit a Smiths electric gauge it's worth remembering.
The Sender
The sender is the most common cause of gauge problems, and a good place to start. Little wheelers and early big wheelers had a die-cast sender held in with 6 screws. Later top fill mokes had a pressed metal sender held in with a locking ring. You can see them if you take off the front pannier cover - but unfortunately to get them out you have to remove the fuel tank. Side fill mokes have a pressed metal sender and locking ring, accessible through the cover plate on top of the pannier.
No matter the age of your moke or what sort of tank, the sender still works the same way - all it does is vary the resistance between earth and the gauge. Full it is around 20 ohms and empty is around 260 ohms. To do this it has a length of resistance wire wrapped around a plastic former and an earthed arm that wipes up and down as the fuel level changes.
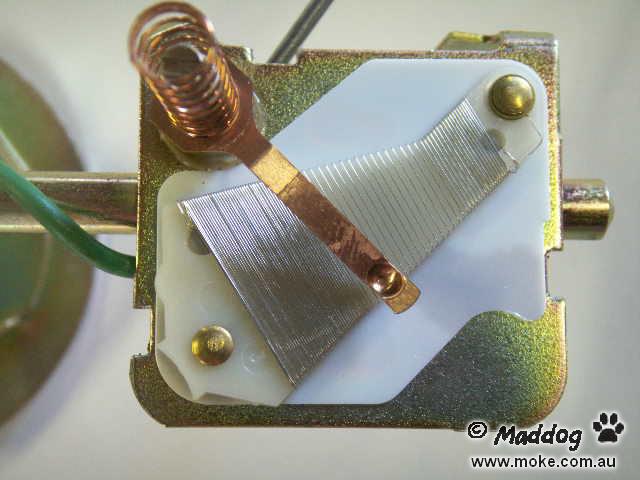
The closer to full the less wire the current has to pass through the get to the gauge. As you can see the wire is incredibly fine and can easily wear through.
For fault finding, you can simply bypass the sender and test the gauge and wiring by removing the wire from the sender unit and connecting it directly to earth (don't forget to turn the key on!). Just remember that even when full the sender has 20 ohms of resistance, so don't leave the wire connected for too long- be as quick as you can and just look for the gauge rising to full.
If the gauge doesn't move, then for now you can assume the sender is okay and check the wiring from the tank and the power to the gauge.
If the gauge moves to full, the first thing to check is that the sender is earthed. Normally this is provided by the mounting, but with years of corrosion it's not always reliable. You can check it with a multimeter, but it's not a bad idea to make up a short wire from the body to the terminal on the top of the sender anyway.
If all that is okay, then you will have to remove the sender. If you have a multimeter, connect one lead to the insulated output terminal and the other to the metal body of the sender. Your readings should be about 20 ohms with the arm up (or full) and around 260 when down. The actual resistance may vary a bit, but this will at least let you know if it's working. If you don't have a multimeter you can connect the sender wire as normal, and you will also need an earth wire onto the body of the sender. Then with the key on, move the arm to full and see if the gauge moves. It can take a while for the gauge to react, but if there are places where the gauge just doesn't work (or you have a zero reading your multimeter), then the wire on the rheostat may be worn through or broken.
Floats
Another common problem is the float attached to the arm. It can either fall off, or get a hole in it and sink. Either way, your gauge will read empty. The only way to tell is to remove the sender. Top fill tanks it will be in the front compartment where you can't see it - side fills are a bit easier.
If the float has a hole just replace it. You can put them in the sun to evaporate the fuel, then seal the leak with a soldering iron - but honestly, why would you bother? If it's lost, try to get the old one out if you can in case it knocks the replacement float off.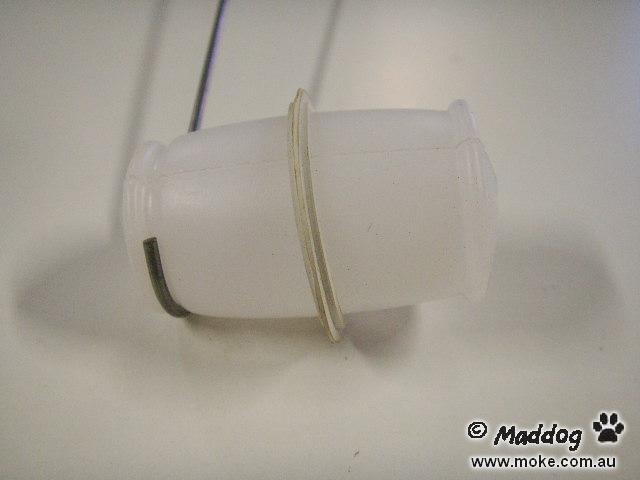
Voltage Stabiliser
This is the small tin box mounted on the back of the speedo. It's purpose is to provide a nice even voltage to the gauge so your fuel level doesn't go up and down according to your battery charge. If you think about it, it makes sense. A half flat battery can be down to 11 volts, and a good alternator can pump out around 14 volts.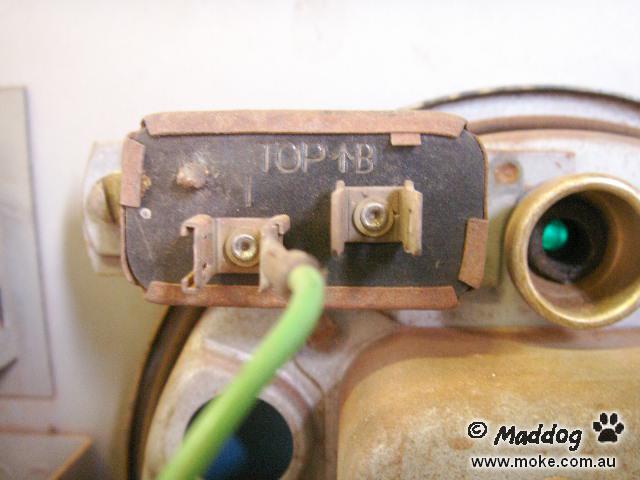
They work by having a wire coil heat a bi-metalic strip, which bends when it gets hot and cuts the current. As it cools it bends back and makes contact and the process continues. Note they must be mounted the right way up, as horizontal as possible and must be earthed. Power goes into the B (battery) terminal, and out through the I (instruments).
Unfortunately they are hard to test! They take anywhere from 30 seconds to 2 minutes to warm up, and then the current is either on or off. A digital multimeter will show either battery voltage or nothing. An analogue meter is slightly more useful, but will still have the needle waving up and down and won't show the real output. But if it's moving then it's a good sign, and you can probably assume it's okay. If you get no reading, unplug both wires and push them back on - it may just be corrosion on the plugs. Also check your speedo is earthed, and the body of the regulator.
Leave it turned on for a while too, as some tend to stop working when the warm up. In this case, the gauge will work when you turn the key on, but then fall to empty soon after.
No voltage or battery voltage means replacement time. New ones are available (at a price), or even better is an electronic version. Something like this is perfect for around $7.
More information on testing and calibrating can be found here.
The Gauge
There is not a lot you can do with the gauge - it either works or not. 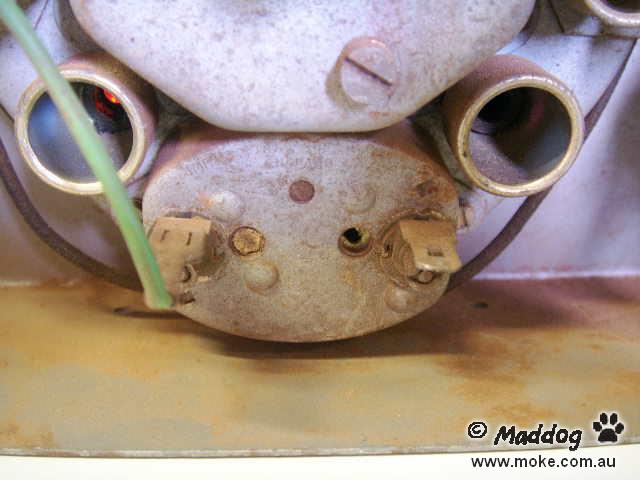
To test it connect the right hand terminal as you look at the back to earth with the key on (assuming you have power from the voltage stabiliser). If the needle moves to full it's okay. If not, try unplugging the wires in case it is just a dirty connection. Replacement gauges are still available - but again, at a price.