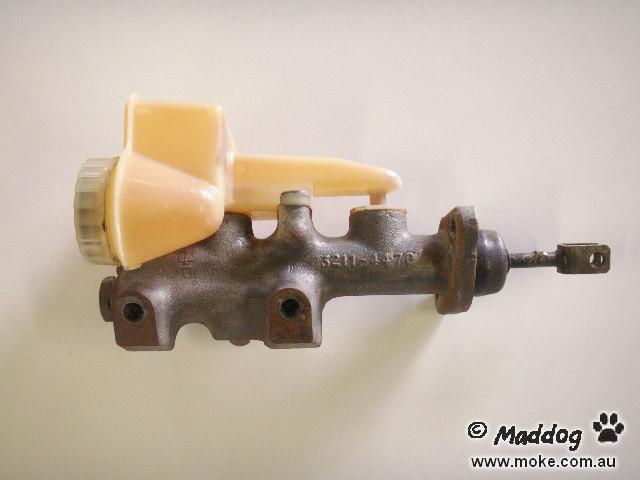
The green band tandem master cylinders were fitted to Mokes from around 1976 until the end of production. While complete cylinders are no longer available new, there are still enough parts available to rebuild your old one.
"Please Note: These are general guidelines only and assume you have some mechanical knowledge. If you are not 100% confident in what you are doing, please seek advice or let a professional do the job".
Before you start, there are a few things to consider. First, how good is the reservoir on your old master cylinder? Replacements are not available anywhere, so if yours is damaged or you don't like the look of it you may want to change to the newer yellow band master or find a better second hand reservoir. Second is how original do you want your Moke? I can almost guarantee the bore will need sleeving - which is an added cost but probably cheaper than a new cylinder. You may also break the brake fail switch if you remove it, and while they are available, they will also add to the cost. Of course, if you want to keep your moke as original as possible then you should ignore the financial side and keep the original, as the newer ones look quite different.
There really is no easy or cheap way around it, but you don't want to cut corners with brakes! As long as the reservoir is good, my preference is to stick with a kitted and sleeved original cylinder.
Removal
First drain as much brake fluid from the reservoir as possible so it doesn't leak everywhere. If you don't have any way to suck it out, open a bleed valve front and back and pump until it is empty. Remove the clevis pin from the end of the brake pedal where it joins the master cylinder. Not easy to reach as it's up under the dash. Check the pin - if there are any wear marks on it, it's probably best to replace it.
Next remove the wires from the fail switch, and then undo the two brake lines. Remove the two nuts that hold it on, rock it a bit and it should pull free.
Disassembly
First remove the reservoir by undoing the two screws that hold it on. They may be tight, so use a big screwdriver, or if that won't work an impact driver.
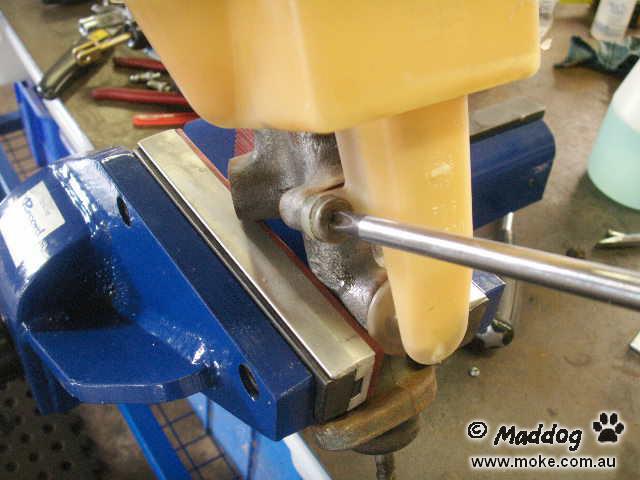
They are special shouldered screws, so try not to damage them.
To get the reservoir off, gently wriggle it and be patient. Don't be tempted to use a screwdriver to help things along - it will only end in tears.
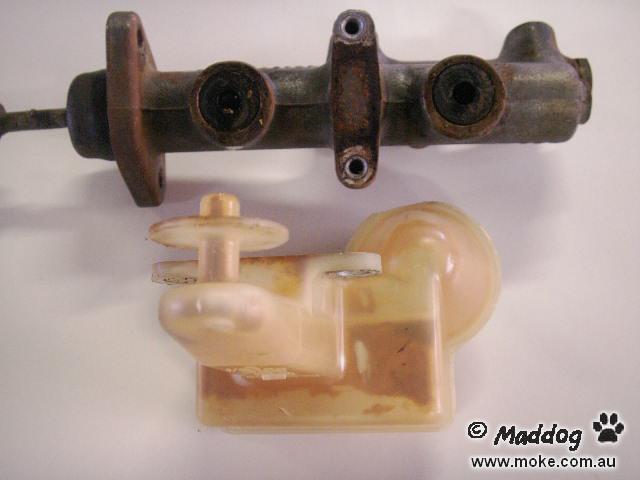
Once off, you may see a build up of crap in the bottom. This one was rebuilt about 10 years ago, so isn't too bad. Wash what you can out under the tap, and then soak it in a strong solution of Napisan or bleach for a couple of days. It's a good idea to remove the rubber seal under the cap first, as the bleach tends to melt it. Just pop the little breather cap off underneath with a sharp pick and pull it out.
To get out the stubborn stains left, block the outlets and pour in half a cup of bleach and a handful of rice. Shake until your arm nearly drops off and then rinse it out. You will be suprised how clean it is!
Now remove the brake fail switch. If it comes out in one peice, you've had a win. If it breaks you can either replace it with a new one, or seal it with a plug and live without a light. If you leave it in you won't be able to remove the brake fail shuttle in the body of the cylinder. For details of the switch and finding replacements, see the article here.
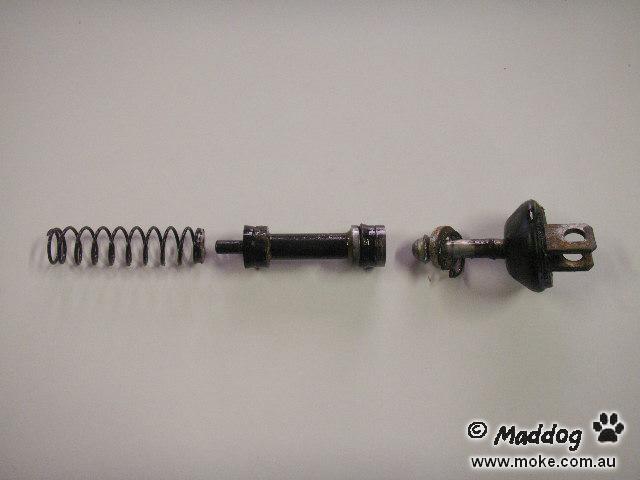
Next remove the circlip on the bottom of the cylinder under the rubber dust cap.
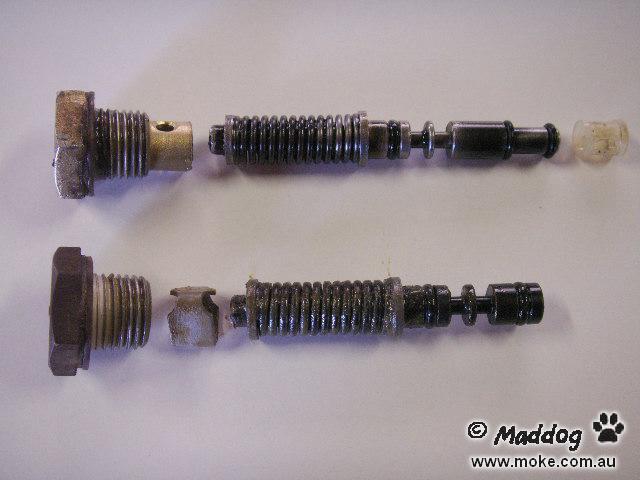
This will let the push rod and bottom piston for the front brakes come out. Looks like this...
To remove the top piston that operates the rear brakes, you need to remove the reservoir seals from the side of the cylinder.
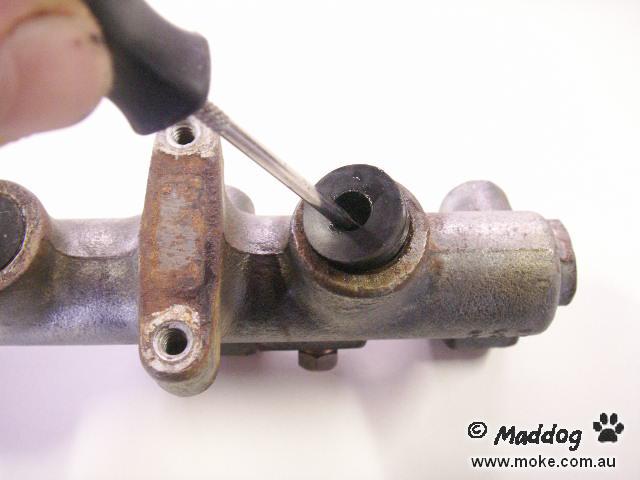
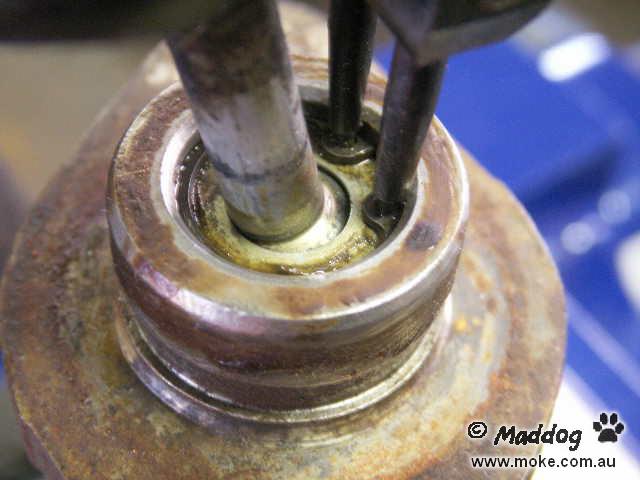
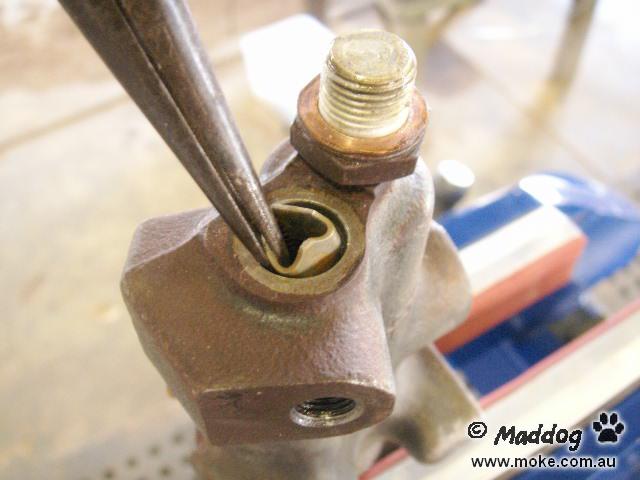
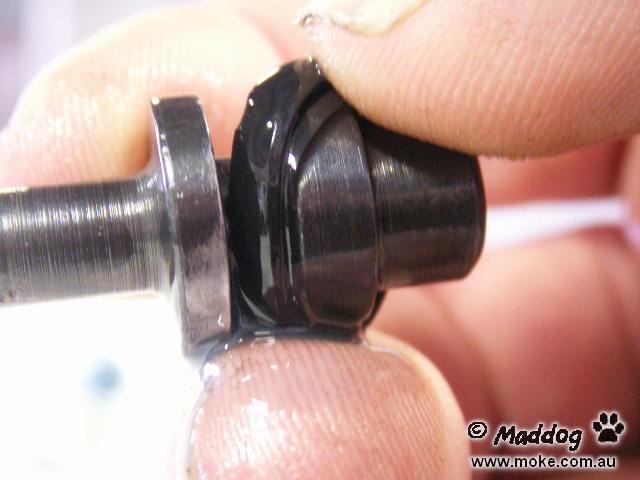
Under the top seal is a small pin that looks like this....
The pin is held in by the return spring pushing the top piston down. To remove it you need to compress the spring and pull the pin out. Slip a peice of wood up the bore and push down on the bench, then with some needle nosed pliers pull on the pin. Don't use metal to push the piston in case you scratch the bore. If you can't find a peice of wood, at least wrap a punch in a bit of rag.
You should be able to feel the piston move up as you push on it - but if it feels solid you may have to use a punch and drive it up. It only needs to go the smallest amount to take pressure off the pin.
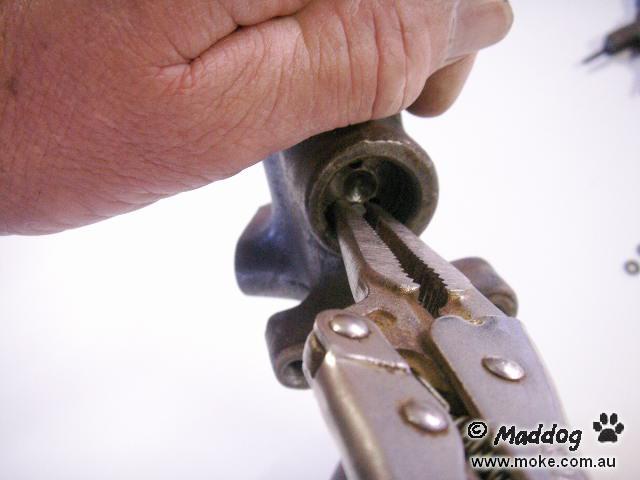
The pin may be tight too, so if you have some needle nose vise grips now is a good time to use them.
This is the pin...

Sometimes the top piston is stuck, so you may need to slam the cylinder down on a bit of soft pine to get it out. If it still won't come you will have to force it out with a grease gun. Screw a grease nipple in the top outlet port (M10 x 1 thread, although 3/8 UNF will fit), and give it a few pumps. Make sure to leave the fail shuttle in place, or grease will bypass to the lower outlet port. If the piston passes the inlet port where the reservoir was attached, grease will escape out the inlet. Block it with a piece of wood or rubber over the hole held in place with a vice.
This is the upper piston for the rear brakes.
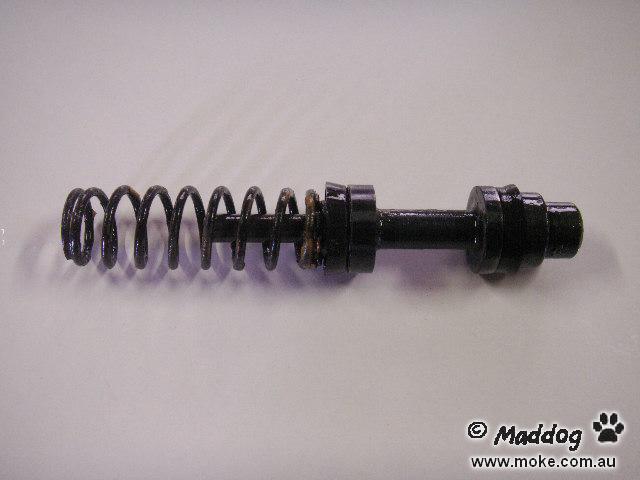
Note the reverse seal on the bottom - it uses pressure from the lower piston to work the upper one.
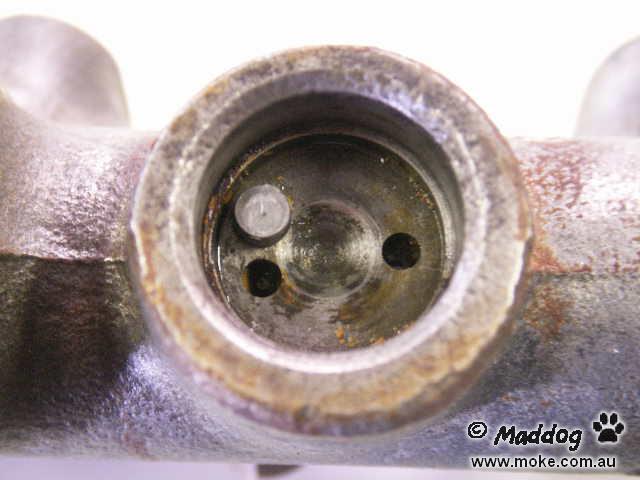
Next remove the fail shuttle from under threaded plug on top of the cylinder.
There are two types of valve - the early ones (pre gal body) have a separate spacer that comes out first as above. Later valves have the spacer built into the cap, and a small plastic spacer under the valve that is easy to miss.
Here are both types...
Note the early version (bottom) has two larger o-rings, the later has one large and two smaller.
Cleanup/Inspection
Give all the parts a thorough clean with metho or brake cleaner - particularly if you have had to use grease to force the pistons out. Use a brass brush or scotch brite pad to remove stains and rust.
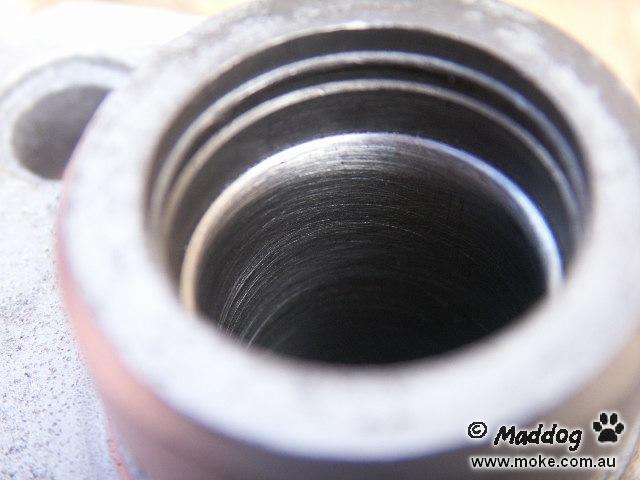
Use a piece of dowel wrapped in a rag and give the bore a good clean, and shine a bright light down it. It should be smooth with no scores or rust pitting. The main areas to look at are at the very top where the backup seal sits, and at each inlet port where the primary seals sit and moisture from the reservoir will gather.
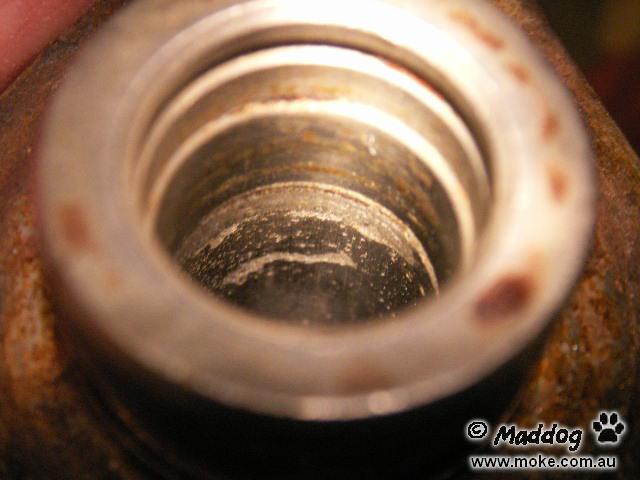
This one is too far gone and is almost as bad further down the bore (but very hard to get a photo of). With these cylinders now 30 years old or more, most will look like this and I would be very surprised if you will get away with just a hone.
The only solution is to have the cylinder sleeved - and although it isn't cheap, it is a long term solution and should last the life of your Moke. For more information on sleeving, click here.
This is the same cylinder after being sleeved....
Honing
The cylinder bore is .70 inches, so you probably won't get a three legged hone in. Keep the hone moving up and down so you get a cross hatch pattern, and use plenty of lubricant.
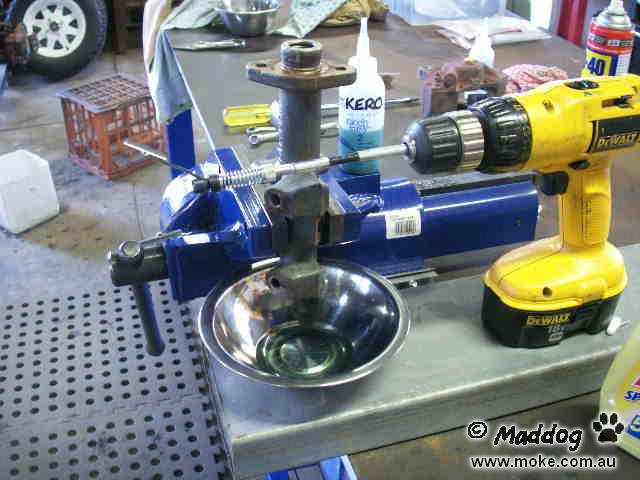
Try not to concentrate on the rusty areas - the whole bore needs the same amount of work so it stays parallel.
Seals
There are two sorts of seal kits available - the first usually have a part number that has 7008 in it and contains just the seals and maybe the springs.
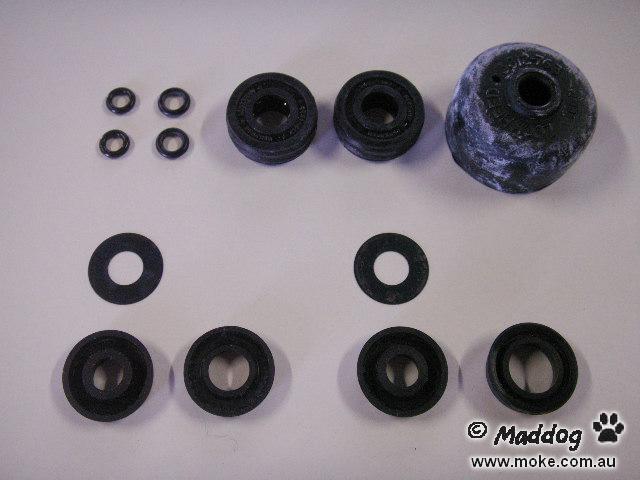
The other kit is a genuine AP kit, and contains the pistons, springs and seals. Minispares UK PN. GRK1002
These kits are only slightly more expensive, but if your old parts are a bit rusty then they are by far the best way to go. They also have the latest upgrades with a captive spring on the lower piston and the seals pre-installed.
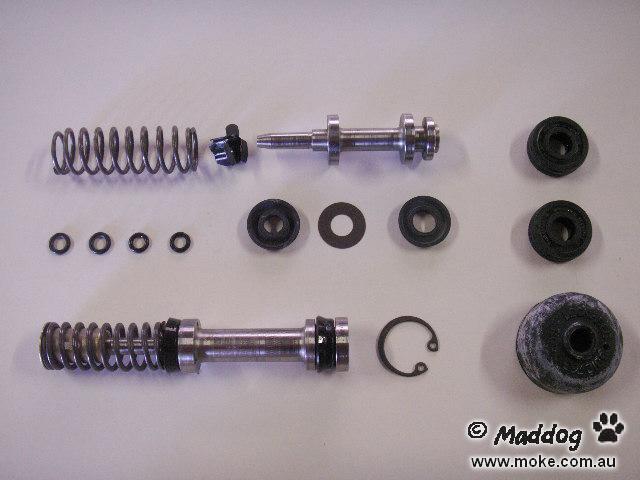
The four main seals are very similar in size and easy to mix up. To sort them, look for two the same with the smallest hole in the middle. These are the primary seals and go on top of the upper and lower piston. Both have the thin washer under them and the lip faces up. The reverse seal has the next biggest hole in the middle, and goes on the bottom of the upper piston with the lip facing down. The seal with the biggest hole is the secondary seal, and goes on the bottom of the lower piston closest to the pedal.
You won't use all of the small o-rings for the fail valve - check above to see which ones you need.
If you're not sure about the springs - the stronger one always goes on top (or in first), regardless of length. If the kit contains the later three cornered spring clips, put them on the piston first and then clip the spring on.
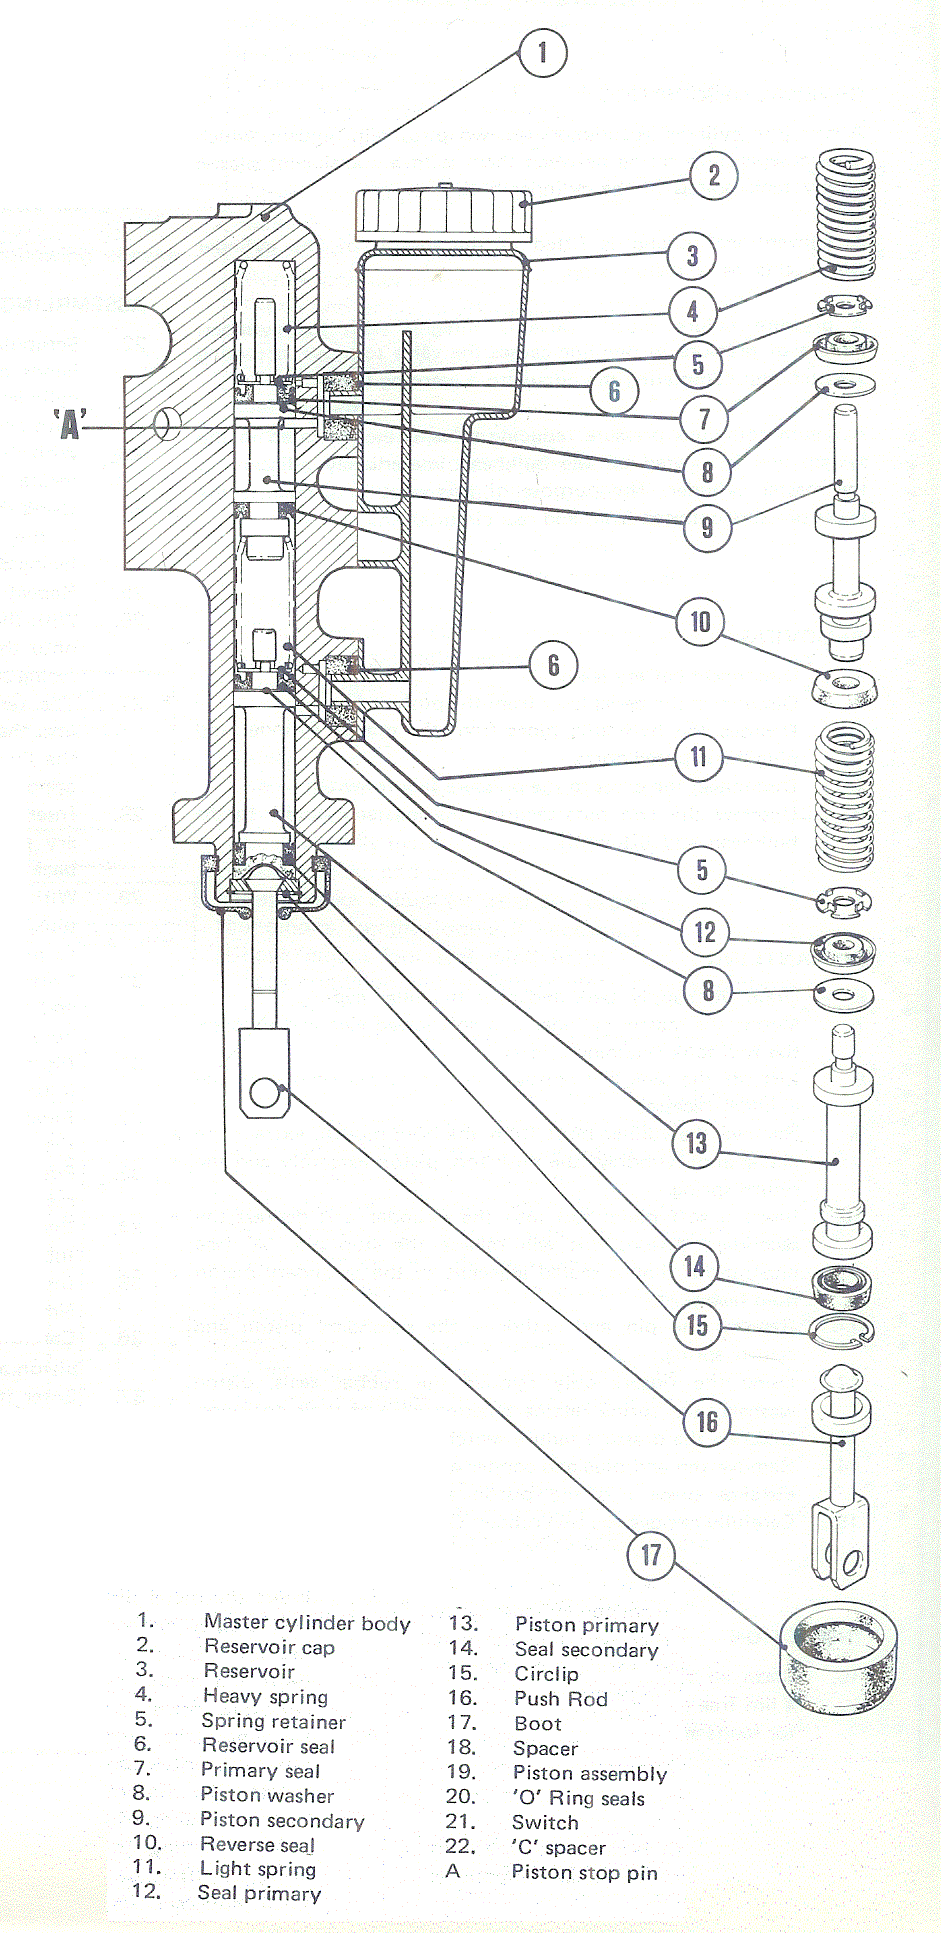
Heres a nice cross section from the Leyland black book.
Reassembly
Give all the metal parts and bore one last clean to make sure they are spotless with no grease or oil (petroleum products destroy brake seals in seconds). Spray cans of brake cleaner are perfect for this - use plenty and let it run freely out of the bore. Have a clean area to put things, and plenty of clean rags handy.
Using plenty of rubber grease or assembly fluid, put all the seals on the pistons with your fingers. Some need to stretch a fair bit, and the slightest nick from an o-ring pick means they will tear.
Don't forget to put the lower seal on the top piston with the lip facing down. Attach the springs and put the upper piston in the bore. It may be hard to start, so use plenty of rubber grease and wriggle it so the lip doesn't fold back. It should slide fairly easily once in, but has a long way to go so use plenty of lube.

The top piston needs to be retained by the little pin, so using your peice of wood again, push the top piston down as far as you can and put the pin back in either of the two lower holes (although I have always found them in the left hole for some reason!). Check it is correct by pushing down on the piston - it should only move around half an inch and spring back up to hit the pin.
Put the bottom one in the same way with plenty of lube, and reinstall the pushrod and circlip to hold it in.
Slide the fail valve back in its bore - but don't forget the plastic spacer first if you have one. Push it right to the bottom with a pencil.
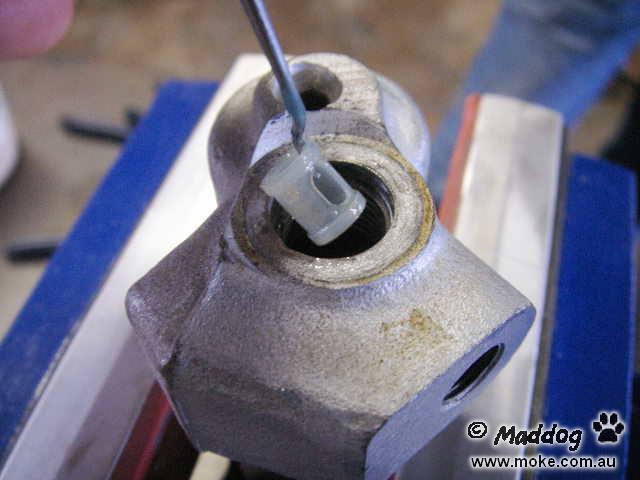
The valve usually needs a good push to go right in. Check in the hole for the switch and you should see the raised ring in the centre if it is right. The valve needs to be in place even if you aren't going to use the switch so the front and back circuits are separated. No fluid should come out, but you will want to block the port so dirt and water can't get in.
Put the plug (and spacer if needed) back in the top. Always a good idea to re-anneal the copper washer.
If you are going to use the fail switch, leave it off until the brakes are bled.
All that's left is to put the reservoir back on. Lube the seals and put them in the ports, push the reservoir home and put the screws back.

Like new again!
Reinstalling
This part is pretty straight forward, just a couple of things to check.
Make sure the brake pedal moves freely, and returns on its own before putting the master back in. If it's stiff - time to pull the pedal pivot out and clean it up.
On all the tandems I have seen there is a thin spacer under the cylinder where it bolts to the pedal box. If you had one - make sure it is still there. Same goes for the gaskets.
When putting the pivot pin back it should slide straight in, or you may have to push the pedal down a bit. You should NEVER have to push the clevis up! This may move the seals past the inlet ports, and your brakes may not work.
Bleeding
The Leyland manual says to bleed front and back on one side at the same time - which is great if you have two helpers. Normal practice is to bleed the wheel furthest from the master first - but the rear won't work until the front is bled.
I find it easier to bleed the front first with a pressure bleeder, then undo a line at the back to get most of the air out and then finish the back manually. The rear usually takes a lot of pressure to get fluid through the tiny bleed nipples - more than you'd want in the reservoir.
Good Luck!
Maddog.