Here's a nice easy job you can do in an hour or two - replace the engine steady bar bushes. While they are often forgotten, new ones can make your Moke much more pleasant to drive - and stop some bigger problems occuring later on!
The job of the engine steady bars is quite simple - to stop the engine moving around on the soft engine mounts found lower down. If they are worn, they can make driving your Moke a bit jerky when putting your foot on and taking it off the accelerator - particularly in reverse. But worse than that, they will put a lot of shock load on the mountings which can either break the mounts or the bolts - and will also put a lot of strain on the exhaust pipe and manifold, again leading to cracks and eventually breakage. Early Mokes only had one bar at the clutch end of the motor, but most Mokes have another at the radiator end as well.
Inspection
To check if your bushes are worn, put your moke in gear with the handbrake off and rock it back and forward, keeping an eye on the ends of the bars. Any noticable movement means they should be replaced. For the hard to see one (under the thermostat), just rest your finger on it and you will feel it moving. And it's really not worth replacing just one bush - do them all. They are pretty cheap!
Sometimes a visual inspection is enough - this one obviously has to go.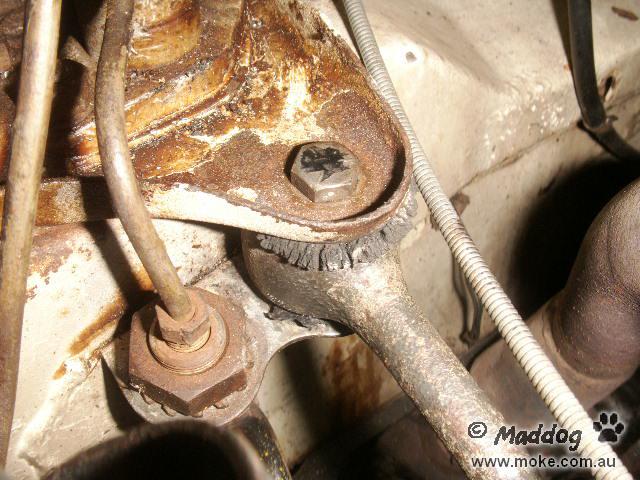
Removal
Removing the bars is pretty straight forward - but there are a couple of points to keep in mind. First, a lot of bars have a slight bend in them. Whether they were made this way, or they have bent over time, I don't know. But it can make putting them back a bit tricky if you get them the opposite way around. I always mark them and put them back as I found them.
Second, remember where the bolts came from. Most of the bolts are around 2" long and are interchangable, but the bolt into the end of the block is only 1 3/4" long. If you use a bolt that is too long, it can punch a hole into the water jacket. The short bolt is 5/8"
If you have a 1275, you will need to remove the breather on the transfer housing to remove the bolt on the end of the block.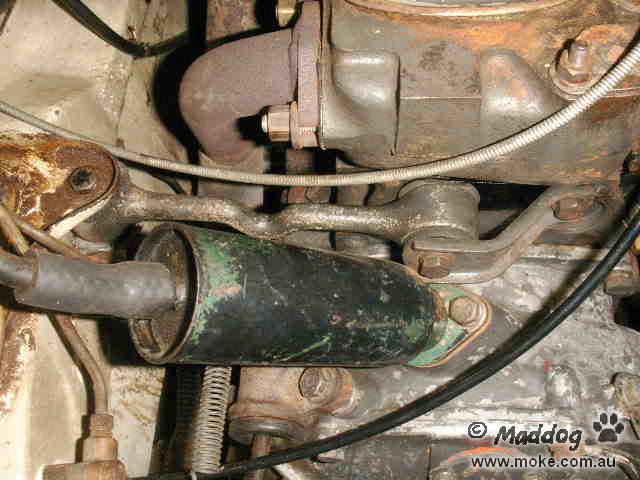
At the radiator end, it should come out with some wriggling. If you haven't got enough clearance to push the bar back, you might need to remove the expansion tank. Also check the bracket on the bulkhead - most are cracked or have already been welded. Make sure the bolts through the bulkhead are tight. 998 engines use the forward hole in the bracket.
Note the kink in the bar above - if you have a 998 there may be an engine breather in this area and you will need to replace the bar as shown to clear the hose.
Problem Bolts
Sometimes you will find the bolt through the bush has rusted into the metal spacer, and you can't get the bolt out. If this happens on the bulkhead bracket near the expansion tank, the best way is to remove the whole bracket and drive the bolt out while supporting the bracket underneath.
Usually the seized bolt is the one under the master cylinders, as the top plate acts like a funnel for any water or stray brake fluid. Unfortunately, to remove the bracket means removing both master cylinders and bleeding both when replacing them. However - there is an easier way.
First, remove the nut from the bottom of the bolt. Then crawling underneath with a long piece of rod and a hammer, belt the bolt up a little bit. This will bend the plate under the master cylinders, and sounds a bit rough, but we will fix that later - and you need some clearance under the spacer that goes through the bush.
Now using a pad handle hacksaw (or even a bit of rag wrapped around a hacksaw blade), cut the bolt off under the spacer.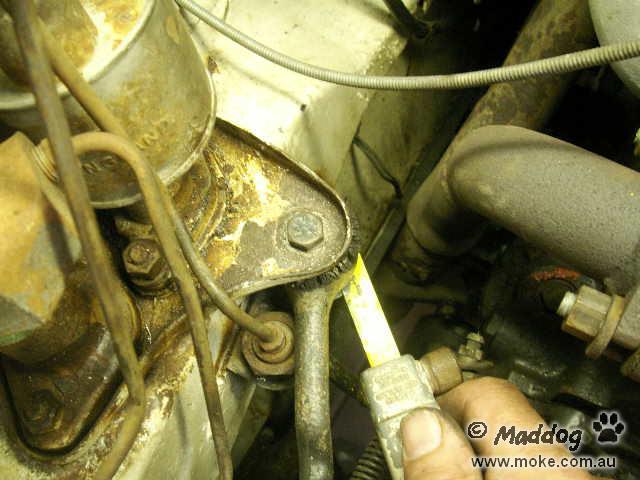
Now centre punch the bolt, and drill an 1/8" pilot hole. Then using a 3/8" drill, drill out the head of the bolt. To stop the bolt turning, jam a ring spanner against the manifold.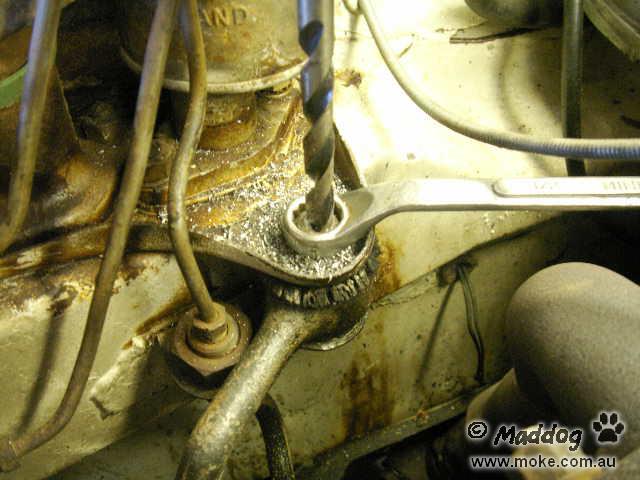
Now the bar should come out, and you can drive the bolt out of the spacer. To bend the plate back to shape, wedge a block between the welded bracket and the plate, and carefully tap it down. The bolt will pull it into place when you reassemble it.
The same method can be used on the thermostat housing bracket, but you need to bend the bottom of the bracket down instead. Cutting the bolt is a bit more difficult, and it can be easier to remove the thermostat housing.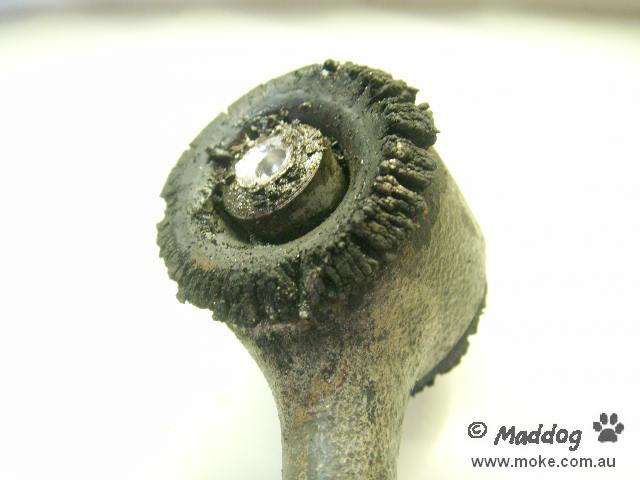
This one was well past it's use by date!
Replacement
Drive out the metal spacer and remove the old bushes. Clean up inside the bars where the bushes sit, to remove any old rubber stuck to them. The spacers also usually need a good wire brush on the outside, and it dosen't hurt to run a round file up the middle to clean them out either.
Put the new bushes in the bars then drive the spacer into the centre until it's flush.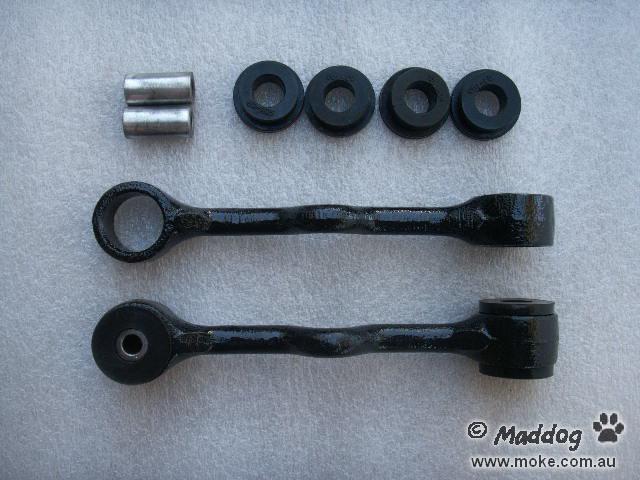
When replacing the bars, put a bit of anti-seize on the bolts, and don't tighten any bolts until you get them all in! It can be tricky getting the last bolt to line up. I find it easier to do the one near the expansion tank last, using a philips screwdriver as a lever to line the holes up.
Good luck!