Nothing makes grubby old Sunraysias look better than having them powder coated. And for the price I wouldn't even bother trying to paint them! But there are a few things you should be aware of.
Preparation
Sounds obvious, but the tyres need to come off first.The rims are quite soft, so it's best not to use tyre levers if you can help it. The safest way is to just pay a tyre place to do it. Tubeless valves also need cutting off, and wheel weights removed.
Check the rims for roundness - the best way is to put them on the rear trailing arm and spin them. Any ripples in the bead area will look twice as bad after powder coating. They can be pulled out easily with a 12" shifter, and any gutter rash removed with a flap disk in an angle grinder.
If the rim is bent in any way that you can't fix yourself, it is best to take it to a professional wheel repairer. They can work miracles, and ensure the wheel is safe to use - for much less than the cost of a new one. A lot of rims weren't that good when new, so it might pay to have them checked anyway.
Powdercoaters
Obviously use someone nearby - but make sure they will sandblast the rims first and ask for a quote. It shouldn't cost any more than $40 a rim.
Colours
There's plenty to choose from, so go nuts! But if you want a close match to original, then ask for Pearl White.
Post Coating Checks
The powdercoat is quite thick, and tends to build up on any edges like around the stud holes. If left, it can chip quite badly when doing the nuts up and look ugly. But even worse, the nuts will be sitting on a pad of thick paint, and can work loose.
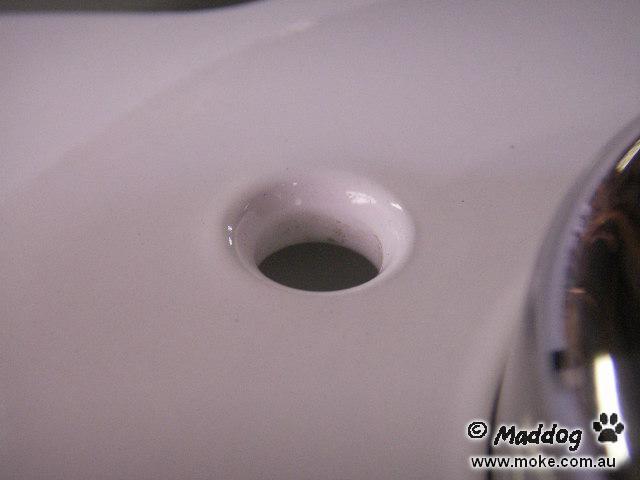
All it needs is a few minutes with some emery tape to clean them up.
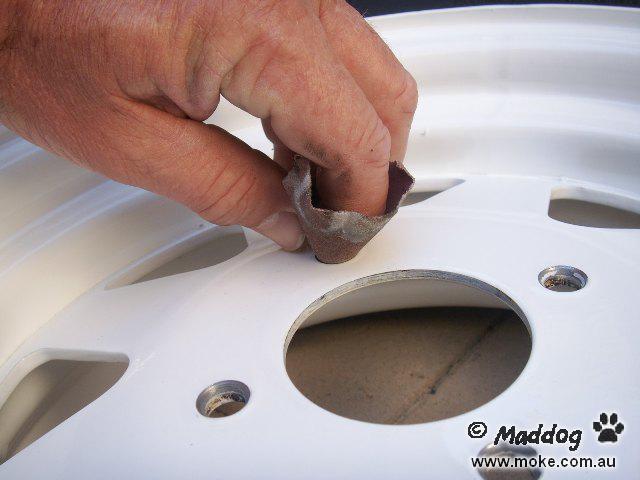

Just don't scratch the powdercoat - it won't polish out!
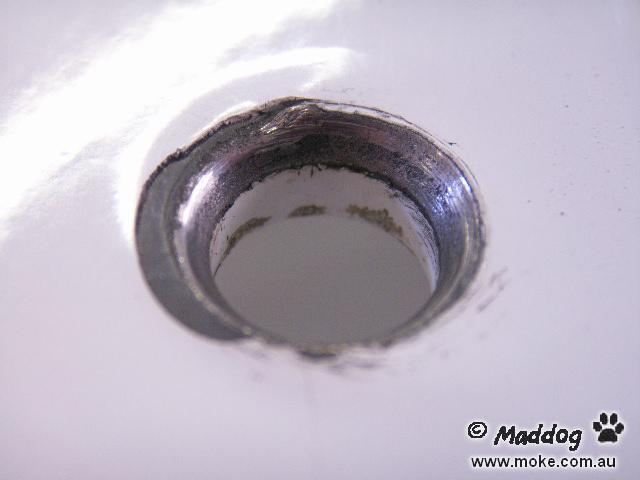
Also check the valve holes. This is where the rims will probably have been hung when coating, and may have sharp chunks of paint that could make the tubeless valves leak when they are replaced.
It is also normal to have some small 'bubbles' where the centre meets the rim. Air gets trapped in the crack and expands as the wheel is baked. Ugly, but unavoidable.
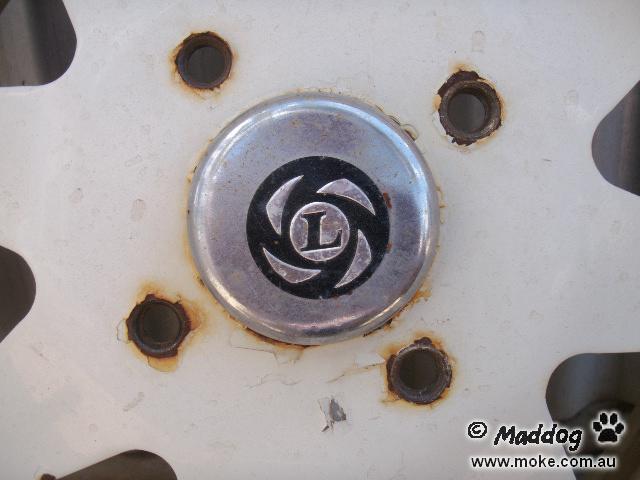
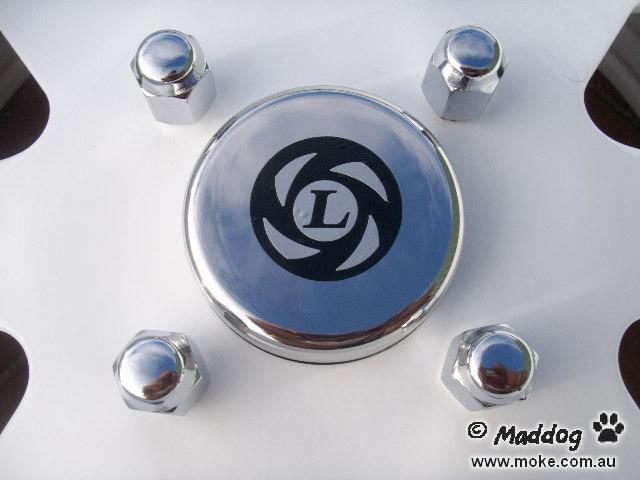
Hubcaps
Bad news - they probably won't fit anymore! But if you have the original caps then it's the same as the wheel nuts, a minute or two with some emery tape to remove the powdercoat from the centre hole.
For replacement caps you will need to check the fit first. With drum brakes they need to be a tight fit so they don't fall into the drum. With discs they won't be able to fall in - but they must be at least flush with the inside of the rim. If they aren't, the rim will be held away from the drive flange by the hubcap, putting a lot of extra stress on the wheel studs.
It's easy enough to check with a straight edge before putting the wheel on, but it is essential that you do it.
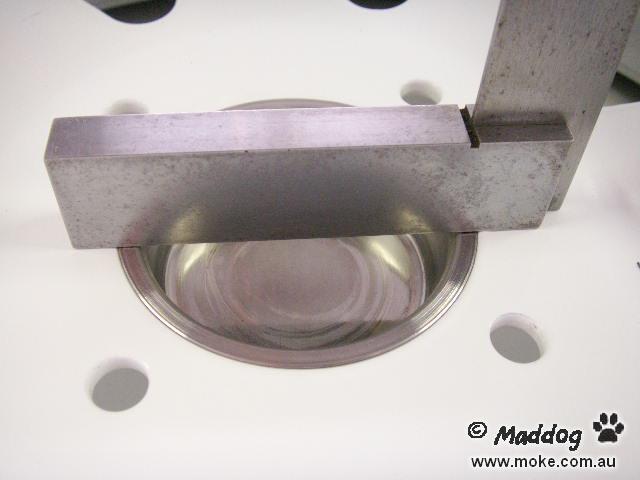
If you need to, don't be afraid to remove all the powdercoat from the recess in the rim - you won't see it again, and the cap needs to fit properly.
It might seem there are a few pitfalls with powdercoating - but at the end of the day it is all worth it. Your rims will look like new, and wth a bit of care will stay that way for a long time!