A very common complaint with rod change gearboxes is the sloppy gearchange. While they will never be perfect, you certainly shouldn't be bashing your knuckles on the dash when changing gears. In most cases it is simply due to wear, and with a bit of time and a few parts you can make a huge improvement.
Unfortunately there are a lot of wearing parts in a rod change - and it only takes a little bit of wear in a few of them to add up to a very sloppy gearchange. The good news is most parts are still available, and are quite simple to repair or replace.
Here are all the major parts and part numbers.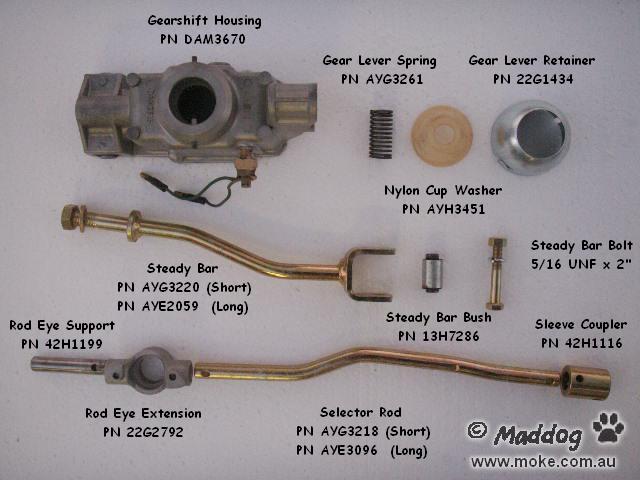 Probably the best way to find out what needs attention is to put your Moke up on stands or ramps, and crawl underneath for a look while someone changes gears.
This is what to look for, in a rough order of importance, and how to fix them.
Cotton Reels
These are the simple rubber mounts that hold the change box in place. Often they have been soaked in oil for years and become soft, or torn by some enthusiastic off road driving. But if they aren't firm enough, moving the gearstick will just rock the change box instead of actually changing gears.
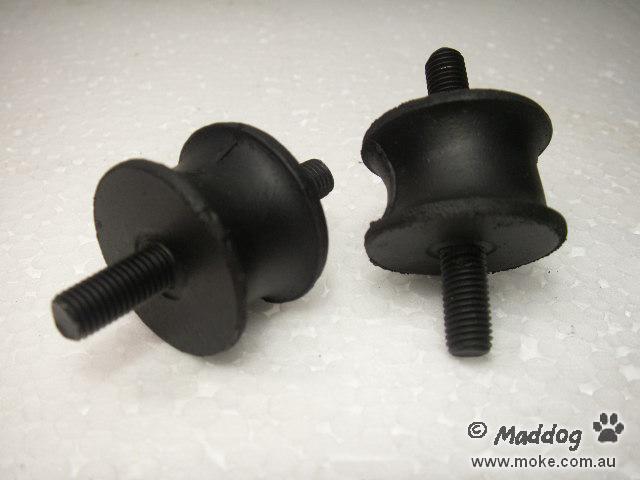
No big mystery here - if they look at all doubtful, just replace them. They are not expensive, and you may be suprised what a difference it makes!
PN GEX7251.
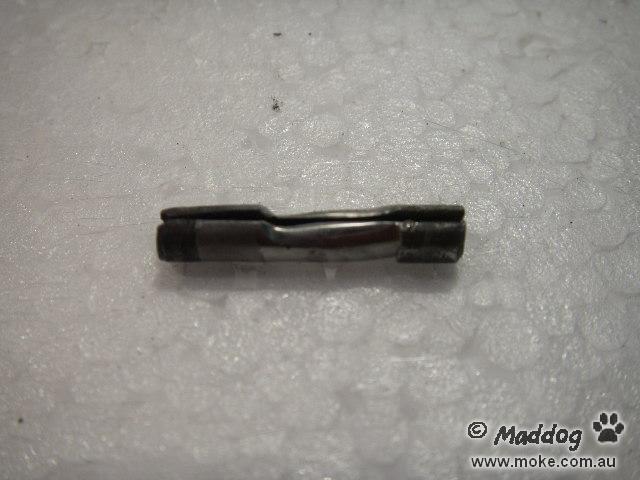
Roll Pins
The change box is connected to the gearbox with a sleeve coupler and two roll pins. The coupler acts as a universal joint, allowing for any mis-alignment between the engine and change box. This means the pins will wear, and need to be replaced regularly. They are very cheap, so there is no excuse for letting them get this bad!
The front pin is very easy to remove, but the rear is best done after the gearchange box has been removed (so as not to bend the shift rod).

For full instructions on how to remove the change box and pins, click here.
It is also worth mentioning that the sleeve coupler is not meant to be tight on the shift rods, a degree of slop is quite normal. The roll pins are also not tight in the shift rods, but should be a very firm fit in the coupler.
Pins are 7/32" X 1", PN RPS1416.
Gear Stick Slot
If you have any radial movement in your gearstick (ie it turns, rather than excessive travel to select gears), chances are the slot in the top ball is worn. The cheapest way to fix it is to run a bead of weld down either side, and clean the slot up with a file. A cutting blade in an angle grinder is quicker, but you will need a very steady hand.
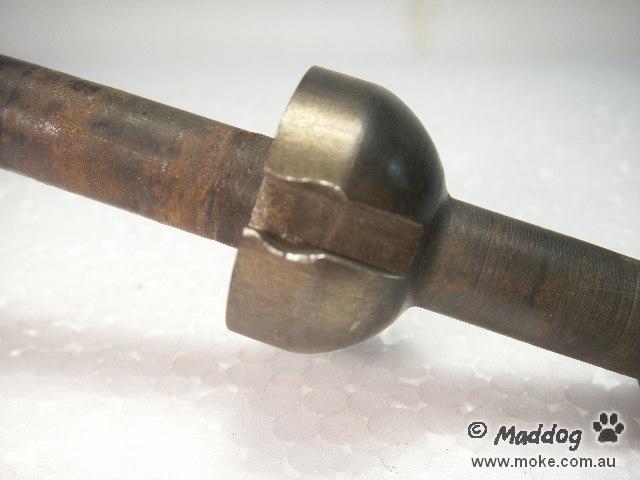
This one is not too bad, but I would still fix it while it was out.
While you have the gearstick out and a welder in your hand, check that the bottom part with the balls on is firmly attached to the lever. The original sticks are two peice, with just a staked press fit to keep them together, and they often become loose.
If you have a 'lift for reverse' type shifter, this is also a good tme to build up the bottom of the stick to make it work again - although it may take some getting used to if it hasn't worked for a while! If the bottom ball is plastic, wrap a wet rag around it so it doesn't melt. Use small welds, and dip it in water after each one.
Also check the small pin that locates the gearstick - it is very hard and won't wear as fast as the stick, but it is replaceable. Always use Loctite on these. PN DAM2670.

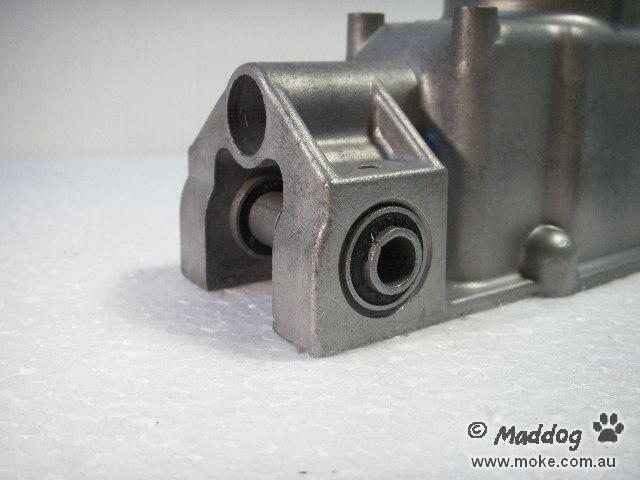
Steady Bar Bush
The change box is joined to the gear box by a steady bar which has a small rubber bush at the end. If your cotton reels are worn, then all the load is transferred to this little bush. This one has seen better days.

There is room to knock it out towards the diff, but it is very hard to get a good swing at it with the engine installed, and you run the risk of breaking the casting off. The safest way is to press it out using a couple of sockets and a long bolt.

Press the new one in the same way. PN 13H7286.
Other Bits
The parts above are the main problem areas, but there are other things worth checking while you have it all apart.
With early Mokes, check the bottom ball on the gearstick. These are a hard plastic, and can wear (later versions are all steel). It is possible to build them up using an epoxy liquid steel - but these products are quite expensive, so weigh that up against the cost of a new stick.


Check the fit of the bottom ball on the stick into the rod eye extension. You don't need to take the rod eye out to do this - but if you do, be very careful knocking out the roll pins. It is quite fragile, and can break!

The wear will be a groove half way up the bore. It is possible to press a plastic bush into these, but they are now readily available and have come down in price so much recently it is probably better to just replace it. PN 22G2792.
The change box itself has two rubber bushes in the rear mount. I have never had to replace them, but new ones are available PN 42B413 or formerly 42H1214.
Inside the change box are two metal bushes that the shift rods slide through. The best way to check them is to see if the shift rod is loose in them. A quick fix is to knock them out and give them half a turn (the clutch and brake pivot pin is the perfect size drift). As far as I know they are not available new, but any good bearing supplier should have something similar. They are .500 inches inside and .600 inches outside and 1/2" long (but can be longer).

On early models there was a rubber boot fitted to stop dirt entering the front bush (PN AYG3246), but again, as far as I know these are no longer available. Later ones had nothing, but a dust boot from a rear wheel brake cylinder fits quite well, and does almost as good a job.
And finally, check that all the hardware retaining the gear stick is correct. This includes a thick washer on the stick, and a special spring.
